> For the complete documentation index, see [llms.txt](https://guides.paynow.gg/llms.txt). Markdown versions of documentation pages are available by appending `.md` to page URLs; this page is available as [Markdown](https://guides.paynow.gg/content/products/creating-a-product.md).
# Creating A Product
## Create The Product
Click on the Create Product located at the [Products Page](https://dashboard.paynow.gg/products)
Fill out the fields in the Create a Product page. The more optimized and informative your descriptions are the better your store will have a chance at performing well. Include all of the features that someone will receive within your product.
### Details
Details of your product contain the essentials, such as name, url slug, description, and price.
### Tags
Adding tags for your store can greatly help organize and categorize your products when you begin creating numerous products. You can create tags and find out more information about them in our Tags page!
### Game Servers
You must select your server(s) you wish your product to be applied to in the game servers field. This tells PayNow where to apply your kit too.
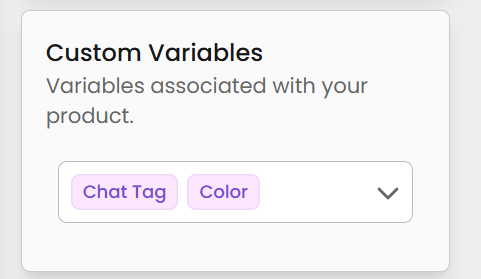
### Custom Variables
If you've created custom variables, you can associate them with a product here.\
Simply select one or more from the dropdown — these will be shown to customers during checkout to gather additional input like color, name tags, or quantity.
This allows for greater product personalization and dynamic command execution.
#### Required Products
Required Products let you gate a product behind other purchases — the customer must already own the products listed here before they can buy this one. Useful for add-ons, bundles, or products that only make sense once a baseline package has been purchased.
Select one or more products from the dropdown. If you select more than one, the **Require all products** checkbox decides how the rule is applied:
* **Off (default)** – The customer only needs to own **one** of the selected products.
* **On** – The customer must own **all** of the selected products.
#### Tier Group
Assigning a product to a **Tier Group** enables cumulative pricing and automatic subscription upgrades/downgrades. Customers who already own a lower tier in the same group only pay the difference when moving up.
Pick a tier group from the dropdown to add this product to it. You can create and manage tier groups on the Tier Groups page.
#### Lifetime
The Lifetime section contains two cards: **Product lifetime cycle** and **Product availability period**.
**Product lifetime cycle**
Defines whether the product is available as a one-time purchase, a subscription, or both — and how long the customer keeps access after they buy it.
* **Allow One Time Purchases** – Customers can buy this product as a one-time purchase.
* **Allow Subscriptions** – Customers can subscribe to this product.
* **Should Expire** – When enabled, access to the product ends after a set duration. Most servers use 1-month packages, but any duration works.
* **Expires / Renews in** – The length of the product's lifetime. For subscriptions, this is also the renewal interval.
**Product availability period**
Controls **when** the product can be purchased on your store, separate from how long access lasts after a sale.
* **Disable product** – Turns the product off immediately. Sets *Enabled until* to now.
* **Enabled from** – The date the product becomes purchasable. Leave empty to make it available right away.
* **Enabled until** – The date the product stops being purchasable. Leave empty for no end date.
Use this for scheduled launches, limited-time drops, or hiding a product without deleting it.
**Trial configuration**
Trials let customers try a subscription product for a limited time before being charged. In PayNow's production testing, trials converted roughly 1 in 4 users into paying subscribers.
{% hint style="warning" %}
Trials are a **Pro plan (Tier 2)** feature and only work on subscription products. **Allow Subscriptions** must be enabled on this product for trial settings to take effect.
{% endhint %}
**Allow Trials** – Enables trials for this product.
* **Revoke immediately when canceled** – When a customer cancels during the trial, access is removed right away instead of at the end of the trial period.
* **Trial Period** – How long the trial lasts (e.g. 30 days). When it ends, the customer is automatically charged for the subscription unless they've canceled.
* **New Customers Only** – When enabled, only customers with no prior orders in a configurable window can start the trial. Use the **Customer must have no orders in the last** field to set that window.
* **Allow Repeat Trials** – When enabled, customers who have previously trialed or owned this product can trial it again after a cooldown. Use the **Customer must not have ordered the product in the last** field to set the cooldown.
On the delivery side, trials use their own command triggers — **On Trial Started** and **On Trial Ended** — available in the Commands section. The **On Purchase** trigger only fires once a trial converts into a paid subscription. New webhooks for trial started and trial ended events are available as well.
{% hint style="info" %}
If you're running a custom storefront, you'll need to update your template to support the trial flow on the frontend.
{% endhint %}
### Stock
Maintaining stock levels can assist with balancing out your server as well it can add a level of desire for your packages that much more when stock is available again. This can help if your server is experiencing too many purchases for a specific server for instance. *A good problem to have.*
#### Upselling
Configure upsells specific to this product. When a customer adds this product to their cart, the recommendations you set here are offered during checkout.
Tick **Enable Upselling** to turn upsells on for this product, then click **Add Recommendation** to add one. The fields are the same as store-wide upsells, plus a **Min. Product Qty** field that only appears here — the minimum quantity of **this** product required in the cart before the upsell is shown.
Per-product upsells take priority over store-wide upsells when both apply. See the Upselling page for a full breakdown of each field.
## Deliverable Actions
### Commands
Commands are essential for your product as this is precisely how you will have your packages assigned to your customers. Below are all the currently available variables we allow in the command creation fields.
Available command variables
* `{order.id}` ID of the order
* `{order.line_id}` ID of the order line
* `{checkout.id}` ID of the checkout session
* `{store.id}` ID of your store
* `{product.id}` ID of this product
* `{product.version_id}` ID of the product version id
* `{product.price}` base price of the product
* `{customer.id}` customer's ID
* `{customer.name}` customer's name
* `{customer.steam.id}` customer's Steam ID
* `{customer.steam.name}` customer's Steam name
* `{customer.steam.avatar}` customer's Steam Avatar
* `{customer.minecraft.uuid}` customer's Minecraft UUID
* `{customer.minecraft.name}` customer's Minecraft name
* `{customer.minecraft.avatar}` customer's Minecraft skin
* `{product.name}` name of this product
* `{product.slug}` slug of this product
* `{order.customer.id}` ID of the customer who bought the item
* `{order.customer.name}` name of the customer who bought the item
* `{order.customer.steam.id}` Steam ID of the customer who bought the item
* `{order.customer.steam.name}` Steam name of the customer who bought the item
* `{order.customer.steam.avatar}` Steam Avatar of the customer who bought the item
* `{order.customer.minecraft.uuid}` Minecraft UUID of the customer who bought the item
* `{order.customer.minecraft.name}` Minecraft name of the customer who bought the item
* `{order.customer.minecraft.avatar}` Minecraft Avatar of the customer who bought the item
* `{order.gifted_by_customer_id}` ID of the customer who gifted the item
* `{order.subtotal_amount}` subtotal amount of the order
* `{order.discount_amount}` discount amount applied
* `{order.giftcard_usage_amount}` amount of gift card used
* `{order.tax_amount}` tax amount of the order
* `{order.total_amount}` total amount of the order
* `{order.currency}` currency of the order
### **Gift card**
In the '**Deliverable Actions**' tab, you can choose to create a gift card by selecting the '**Gift Card**' option. This allows you to provide customers with a gift card equivalent to the product's price upon purchase.
### **Discord**
It is also possible to execute various actions on **Discord.** To do this, you first need to set up a Game Server, which will be used to configure the **Discord bot** in a similar way to your regular game servers.
There is also an option to **kick** or **ban** users from the **Discord**, as well as generate an invite link.
### **Downloadable Files**
Downloadable products can be added to any package, giving users immediate access to their download upon purchase. Once the transaction is complete, the user will see the download link directly on the checkout screen. Additionally, they will receive an email with the download link, allowing them to access the product at any time.
If a downloadable product is updated, users who previously purchased the package will automatically gain access to the updated version.
To prevent users from receiving new content added to an existing product they’ve already purchased, it’s recommended to create a **new product** rather than updating the existing one — **unless** the update is to the file they originally purchased.
#### Metadata
The **Metadata** tab allows you to attach custom key-value fields to a product. These values are not shown to customers, but are included in **webhook payloads** and the **Product API** response.
This feature is useful for:
* Sending structured data to external systems.
* Tagging or categorizing products for backend automation.
* Storing configuration values used by delivery scripts or external platforms.
To use it, click **Add field** and enter your desired key and value. The data will be available whenever this product is retrieved through the API or included in a purchase event.
***
After completing the necessary steps, click '**Create**' to finalize the package. If you'd prefer to set up the package with only the essentials for now, you can skip some steps and edit the package later to add more details.
## Uploading A Product Image
After creating the product you'll then be available open it back up to add your custom image in the top right of the product edit page.
{% hint style="info" %}
Recommended size of at least 256x256px.
{% endhint %}